How to Clean Your Oven Without Harsh Chemicals
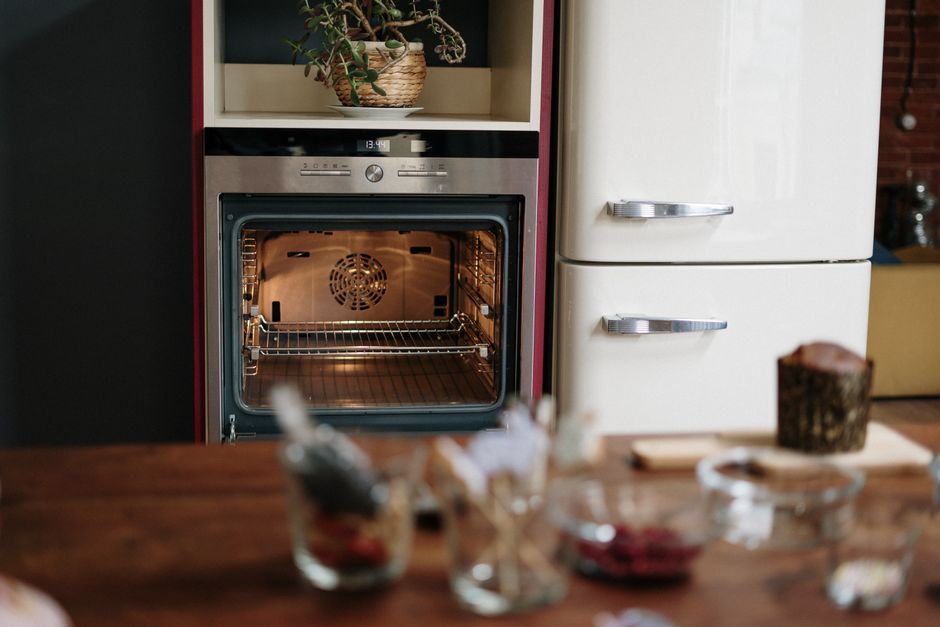
Cleaning an oven often brings to mind strong chemical fumes and gritty scrubbing. Many conventional oven cleaners contain harsh ingredients that can be tough on both the appliance and the person doing the cleaning. For those who prefer a more natural approach, there are effective methods using common household items like baking soda and vinegar. These substances offer a way to tackle grease and grime without the need for caustic chemicals.
This article explores a process-oriented approach to oven cleaning that emphasizes transparency and methodology. It explains how baking soda and vinegar can be used to break down residue, how to apply them safely, and what steps to follow for a thorough clean. The focus is on the process itself, providing information rather than guaranteed outcomes.
Whether you are dealing with a lightly soiled oven or a heavier buildup, understanding the behavior of natural cleaning agents is helpful. By following a structured routine, you can maintain your oven using ingredients that are likely already in your kitchen.
Understanding How Baking Soda and Vinegar Work
Baking soda, or sodium bicarbonate, is a mild alkali that can help loosen dirt and neutralize odors. When mixed with water, it forms a paste that adheres to vertical surfaces and provides gentle abrasion. Vinegar, an acetic acid solution, reacts with baking soda to produce carbon dioxide gas, which can help lift away particles. This reaction is often used in eco-friendly cleaning because it provides a chemical action without the harshness of commercial cleaners.
It is important to note that the effectiveness of these ingredients depends on several factors, such as the type of soil, the surface material, and the amount of time the paste is left to sit. For example, baked-on grease may require multiple applications and prolonged dwell time. The process is not a quick fix but rather a methodical approach that relies on patience and the chemical properties of the ingredients.
When using this method, it is advisable to protect the surrounding area and to avoid mixing the substances in a closed container, as the gas expansion could cause pressure buildup. A simple open bowl or a spray bottle for the vinegar is sufficient. Always test a small, inconspicuous area first to ensure compatibility with your oven’s finish.
Preparing Your Oven for Natural Cleaning
Before starting any cleaning process, it is essential to prepare the oven. Begin by removing all racks, trays, and any loose debris. This allows you to access all interior surfaces and prevents the paste from spreading to areas that do not need cleaning. Inspect the oven for any metallic parts or surfaces that might be sensitive to abrasives. If the oven has a self-cleaning feature, it is not recommended to use this method concurrently, as the high heat could cause the baking soda and vinegar mixture to bake on.
Next, create a paste using baking soda and water. The consistency should be similar to that of a thick frosting, which can be spread easily and will stick to walls and the floor of the oven. For a standard oven, about one cup of baking soda mixed with a few tablespoons of water is often enough. Stir the mixture until it forms a spreadable paste. If you prefer, you can add a drop of natural dish soap to enhance the degreasing action, but this is optional and should be tested in a small area.
Once the paste is ready, apply it generously to all interior surfaces, avoiding any openings or heating elements. Use a spatula or a brush to spread it evenly, focusing on areas with visible grease or burnt residue. Do not worry if the paste is thick; it will dry over time, and this is a sign that it is working. While the paste sits, you can clean the racks separately, using a similar paste or a soak in warm water with vinegar.
Applying the Natural Cleaning Method
After the paste has been applied, let it sit for at least 12 hours or overnight. This extended dwell time is crucial because it allows the baking soda to slowly dissolve the grease and grime, making it easier to wipe away. The length of time may vary depending on the degree of soiling. During this period, the paste may dry and crack, which is normal. The active process is taking place at the surface where the paste meets the residue.
After the waiting period, take a spray bottle filled with white vinegar and spray the dried paste. The vinegar will react with the baking soda, causing it to fizz. This reaction can help lift the loosened residue from the oven walls. Allow the fizzing to settle for a few minutes. The mixture will turn into a liquid solution that can be wiped away with a damp cloth or sponge.
When wiping, use gentle, circular motions to avoid scratching the oven’s interior. You may need to rinse your cloth frequently and change the water periodically. For stubborn spots, you can apply a fresh paste and repeat the process. The goal is to remove all residue without leaving any soapy film. Once the oven appears clean, do a final wipe with plain water to ensure all residues are gone.
Final Rinsing and Drying Steps
The final rinsing step is essential to ensure that no baking soda or vinegar residue remains. If any residue is left behind, it could cause a slight odor or affect the performance of the oven during future use. Fill a clean spray bottle with water and mist the entire interior. Then, use a clean, damp cloth to wipe down all surfaces, paying attention to corners and crevices. You may need to repeat this rinsing process two or three times to remove all traces of the natural cleaners.
After rinsing, dry the oven thoroughly with a soft, lint-free cloth. This helps prevent rust and water spots. It is also a good time to check that no paste has gotten into the oven door’s hinges or vents. If any residue is found in hard-to-reach areas, use a cotton swab dipped in vinegar to clean it.
Finally, replace the oven racks and trays. It is advisable to keep the oven door open for a few hours to air out and ensure that everything is completely dry before the next use. This natural cleaning process can be repeated as needed, depending on how often you use your oven and how quickly it accumulates grease.
Maintaining a Cleaner Oven Naturally
To reduce the frequency of deep cleaning, it is helpful to adopt some habits that minimize grease buildup. Using a protective liner at the bottom of the oven can catch spills, but be cautious with the type of liner, as some can affect heat distribution. Wiping up spills as soon as the oven cools can prevent them from baking on. Also, using the broiler with caution and covering dishes while baking can decrease the amount of splatter.
Incorporating baking soda and vinegar into a regular maintenance routine can also be effective. For example, placing a small bowl of vinegar in the oven overnight can help absorb odors, and wiping the interior with a vinegar solution weekly can keep surfaces moderately clean. These practices are additional measures, not replacements for the deep cleaning method described.
It is important to remember that the outcome of any cleaning effort depends on the condition of the oven and the consistency of the method. Natural cleaning agents offer a viable alternative to harsh chemicals, but they require time and effort. By understanding the process and having realistic expectations, you can maintain your oven in a more environmentally friendly way.
Natural oven cleaning is a process that relies on the chemical interplay of common household ingredients. It is not a one-size-fits-all solution, but rather a flexible approach that can be adapted to different levels of soiling.
When done regularly, this method can help you keep your oven in good condition without resorting to synthetic cleaners. The key is to allow sufficient time for the ingredients to work and to follow each step carefully. With patience and a systematic approach, you can effectively manage oven grime using baking soda and vinegar.